If your Dell laptop microphone not working, don't worry! This common issue can often occur in mid-range or even high-end laptops. The good news is that it can be resolved with a few simple troubleshooting steps.
Read on to learn the main reasons behind this problem and 12 detailed steps to fix the microphone. So without any further delay, let's get started!
6 Potential Causes Why Microphone is Not Working on Dell Laptop
Let's look at some of the common causes behind microphone not working problems on Dell laptops:
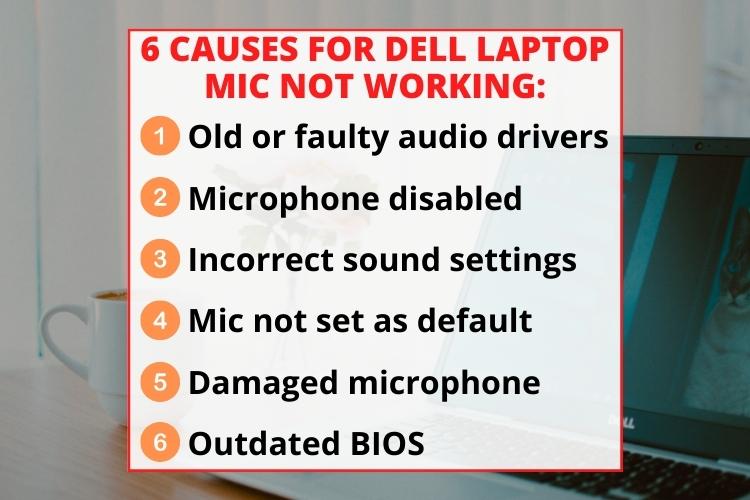
- Outdated or corrupt audio drivers: Outdated drivers can cause conflicts and compatibility issues that prevent the microphone from functioning efficiently.
- Microphone disabled: The microphone can accidentally become disabled in the sound settings in Windows or the Dell audio software. If disabled, it will appear as not working.
- Misconfigured sound settings: Incorrect sound settings like low microphone volume levels or muting will result in the microphone not working.
- Microphone not set as default: If the microphone is not set as the default device in Windows sound settings, it will not pick up any input audio. This is a common settings issue that prevents the mic (or the external mic) from working.
- Damaged microphone: Physical damage from drops, accidents, or liquid spills can break the delicate microphone hardware and prevent it from working correctly. Replacing a damaged microphone may be required.
- Outdated BIOS: If the system BIOS firmware is outdated and has not been updated, it can have compatibility issues with newer microphone drivers and hardware, leading to malfunctions. A BIOS update may resolve mic issues.
Now that we've covered some of the most common culprits behind microphone issues on Dell laptops, I'll go over 12 potential solutions and steps to get your microphone working again. Let's check them out!
Read also: 6 Best Wireless Mics for Computer Reviewed in 2025
How to Fix if a Dell Laptop Microphone Not Working Properly?
So if you are faced with the fact that your Dell Laptop microphone does not work consider the following solutions to the problem!
1. Reboot Your Dell System
Restarting the Dell laptop can clear any software errors contributing to microphone failures. In fact, rebooting is the simplest solution that will reload all drivers and reset temporary settings that may have been causing malfunctions.

Solution
To restart your Dell:
- Save any open documents and close all programs;
- Click the Start button and select Restart;
- The laptop will shut down and automatically restart.
2. Inspect Microphone Hardware and Connections
Physical damage to the microphone jack or internal microphone components is a common reason for recording audio input failure on Dell laptops. This could involve:
- A blocked jack;
- Broken internal mic;
- Loose cabling.
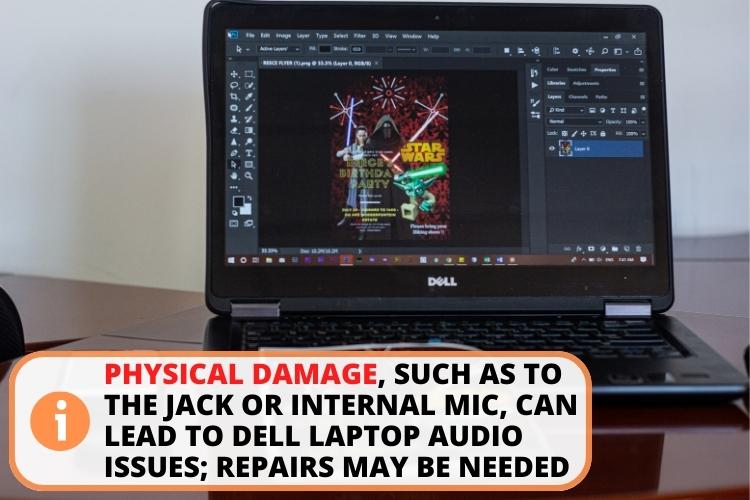
A thorough inspection and possible repair is required.
Solution
If hardware issues are suspected, troubleshooting steps include:
- Check the microphone jack for blockage: Debris, dust, or obstructions in the jack can prevent sound input. Carefully inspect and clean the jack.
- Examine internal microphone and wiring: The delicate internal mic can become disconnected or damaged. Visually inspect for breaks in cables or loose connections.
- Seek professional repair: If physical damage is confirmed, professional repair or part replacement may be needed.
3. Confirm Microphone Compatibility with Hardware and Software
Lack of microphone compatibility with a Dell laptop's audio drivers, Windows software, or hardware components is an issue that can prevent proper microphone function.
The problem can also arise from improper driver installation or hardware changes. An incompatible or unsupported microphone will typically not be detected or malfunction during use.
Solution
If compatibility problems are suspected, actions to take include:
- Update audio drivers: Outdated drivers can lose compatibility with mics over time. Install the latest Dell drivers.
- Try different microphones: Test with another external microphone, like wired or Bluetooth headsets, to isolate the issue.
- Check Windows compatibility: Verify the mic is supported by Windows under Control panel > Hardware and Sound > Sound > Playback. A voice bar will be in front of the mic, which is working. If there is no bar, the microphone is not compatible.
Read Also: 7 Best Laptops for Music Lovers Reviewed in [y]
4. Make the Microphone as the Default Recording Device
If the microphones are not set as the default audio devices in Windows, they will not receive input. This also happens when there is more than one microphone. In this case, Windows doesn't select any device for microphone recording automatically.
Solution
To set your mic as a default:
- Go to Control Panel > Hardware and Sound > Sound icon;
- On the Recording tab, right-click the microphone and select Set as Default device;

- Click OK to confirm;
- Test the microphone array and see if it now detects input.
5. Turn On the Microphone and Deactivate the Audio Enhancements
The microphone may just be disabled or set too low to be heard. Double check it is enabled and set at an audible level. This problem mainly occurs in the newer models. Moreover, audio enhancements like noise cancellation can also interfere with the microphone's normal working.
Solution
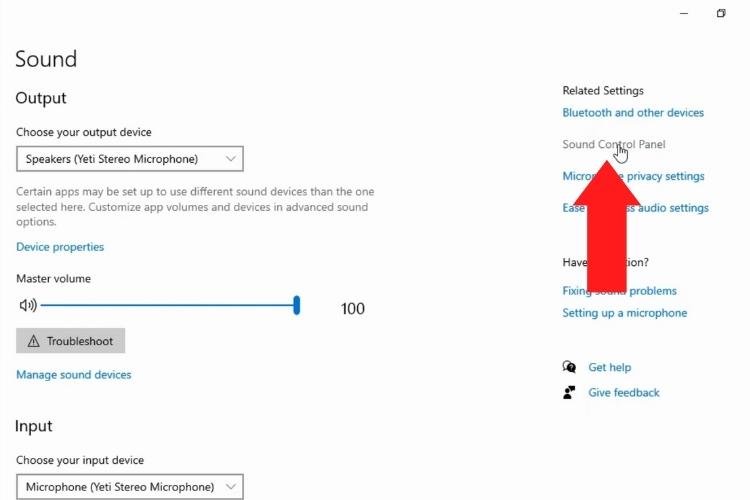
To fix the microphone not working, follow these steps to target the audio settings:
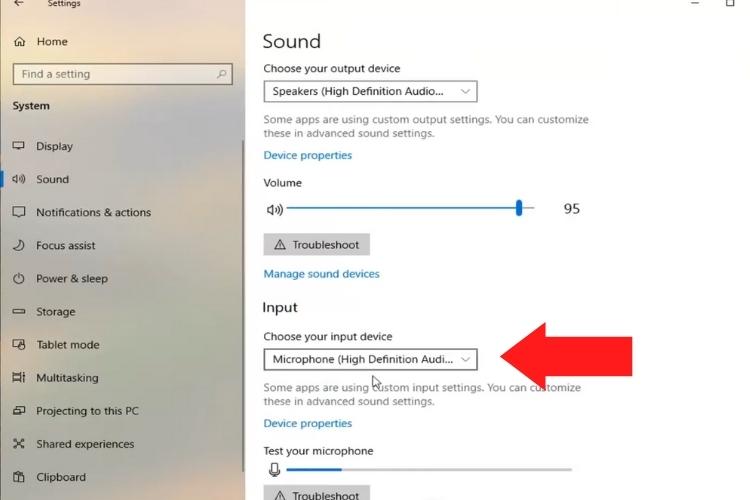
- Go to Settings > Sound;
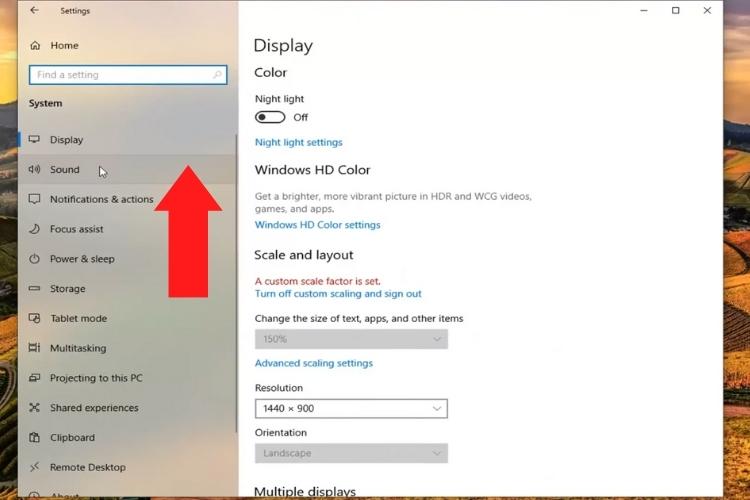
- On the Input tab, select your mic to enable it;
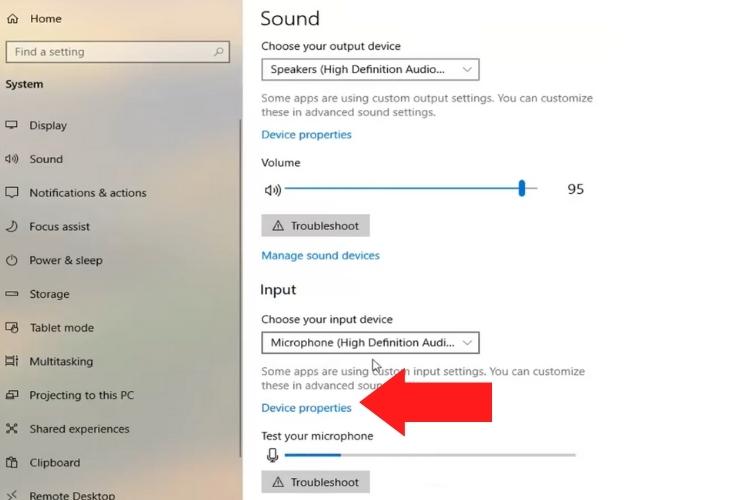
- Don't forget to check the arrow key to see the Properties;
- Under the Input Settings, adjust the format and input volume to max to ensure your mic is all set to perform;
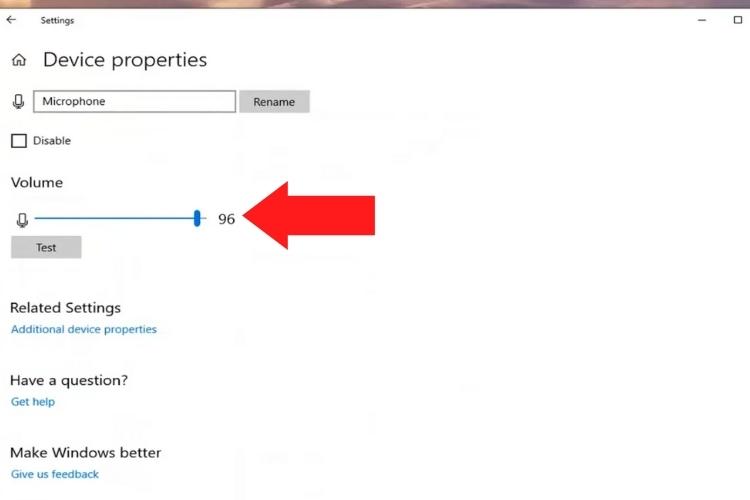
- Also, look for the "Audio enhancements" option below and put it to "off."
6. Grant Microphone Permission
Sometimes, privacy settings may be blocking microphone access for specific apps. Enable permission as needed. If the microphone has no permissions, it won't work correctly.
Solution
To set up microphone access:
- Go to Settings > Privacy & Security > Microphone;
- If you want to allow access to all apps, toggle the switch in front of "Microphone access;"
- To customize the mic for individual apps, turn on the second switch and enable/disable the option for every application;
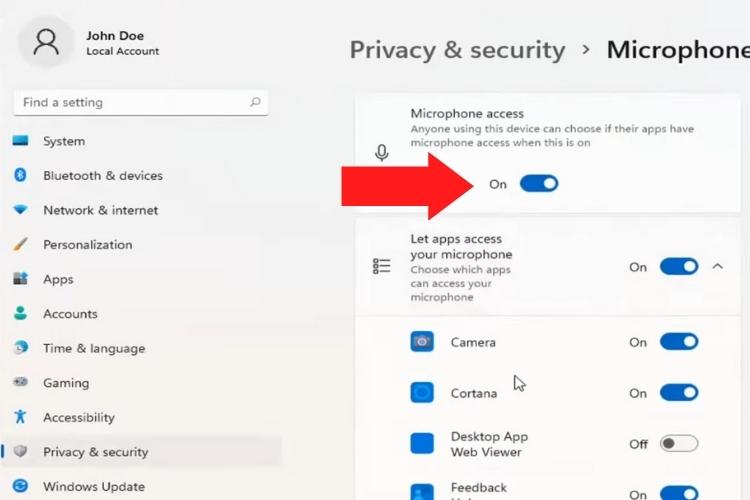
- Test microphone in allowed apps to see if this resolves issues.
Here's a related video you should check out.
7. Check App-Specific Microphone Preferences
Some apps like Zoom and Skype have microphone audio settings. Verify the mic setup is correct at the app level.
Solution
To check app settings:
- Open the app and locate the settings/preferences area;
- Look for microphone options and check the mic selected is correct;
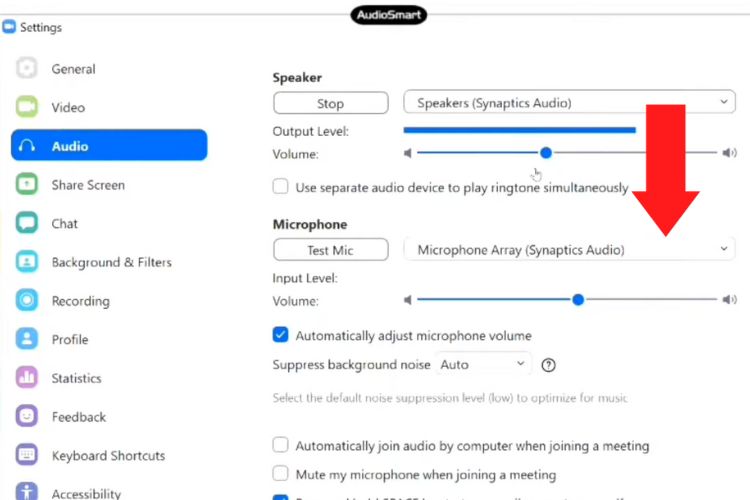
- You can reinstall/update the app to address the issue if everything is fine.
8. Reboot Sound Service
Restarting the audio service will reset the microphone and drivers. These services are usually provided by the manufacturer or operating system provider and are required for the normal functioning of the Windows audio performance.
Solution
To restart the audio services:
- Press Windows + R or search "cmd" in the Start menu to open the Run command;
- Type "services.msc" and click OK;
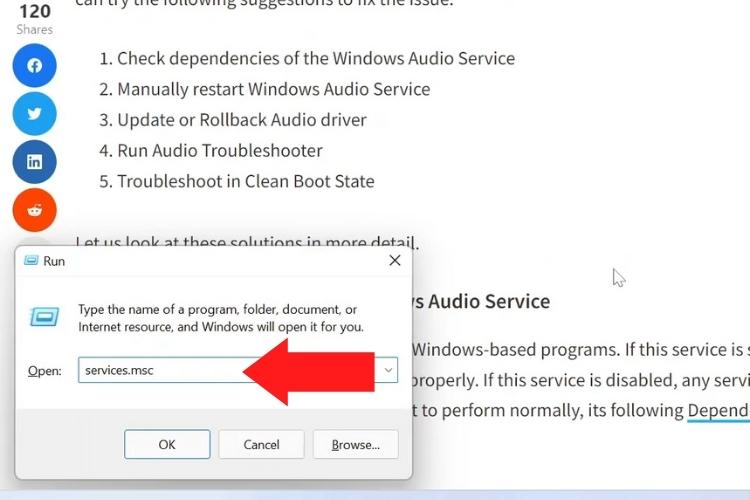
- Locate the services named Windows Audio, Windows Audio Endpoint Builder, and Remote Procedure Call (RPC);
- Right-click each service and select "Restart;"

- This will restart the mic and drivers.
9. Use Windows Troubleshooter
Windows includes a utility tool called "Troubleshoot." Its job is to help you diagnose software or hardware glitches in your laptop and advise you to fix them. An audio troubleshooter works similarly and can find and address common mic issues.
Solution
To run the troubleshooter:
- Go to Settings > System > Troubleshoot or search Troubleshoot in the Start menu;

- Select Other trouble-shooters;
- Run the Audio troubleshooter and follow the prompts;
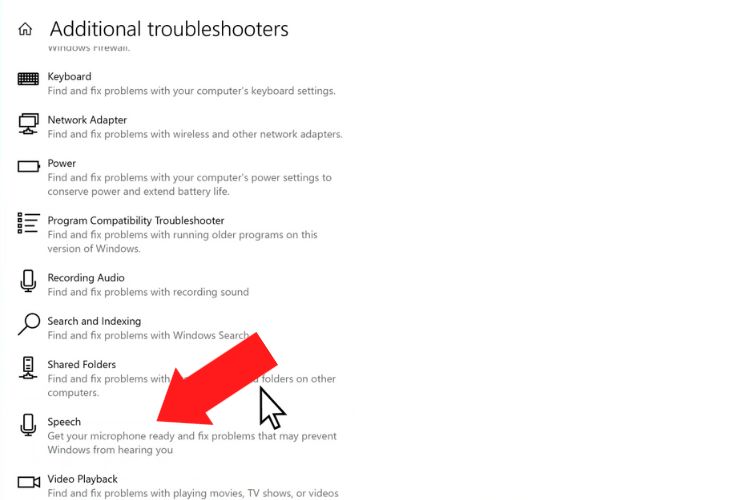
- Restart your laptop after troubleshooting completes.
Alternatively:
- Go to Settings > System > Sound;
- Scroll below and find a tab named "Tab";
- Choose "Input devices" to troubleshoot your microphone on the first option.
10. Using Dell's Diagnostic Tool
Dell provides an audio diagnostic tool to test problems with your laptops. Like a troubleshooting tool, it scans your PC for possible issues and then gives suggestions based on the situation.
Solution
To use Dell diagnostics:
- Search the web for "Dell's Diagnostic Tool";
- Open the first site from Dell;
- Download and install the Dell SupportAssist app;
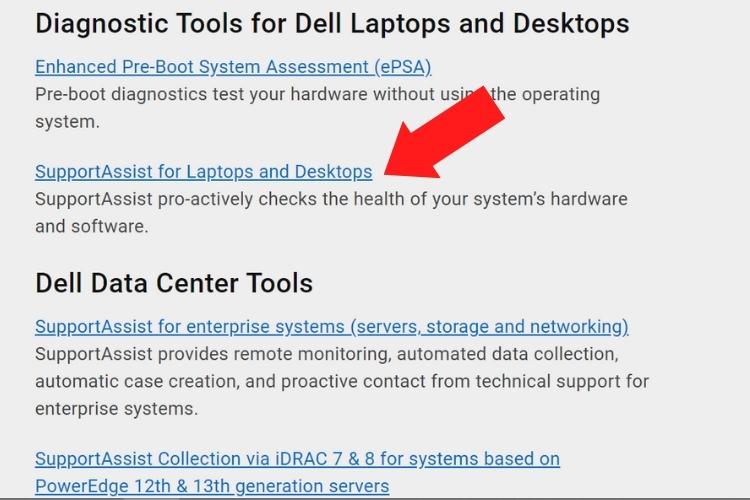
- Follow prompts to analyze your microphone;
- It will check for hardware issues and calibrate the mic;
- Restart when complete and test the microphone.
11. Update Windows OS and Drivers
An outdated OS can cause microphone incompatibility. Moreover, a new OS version can also bring glitches that corrupt the microphone's drivers. In this case, a fresh copy of Windows always works well.
Solution
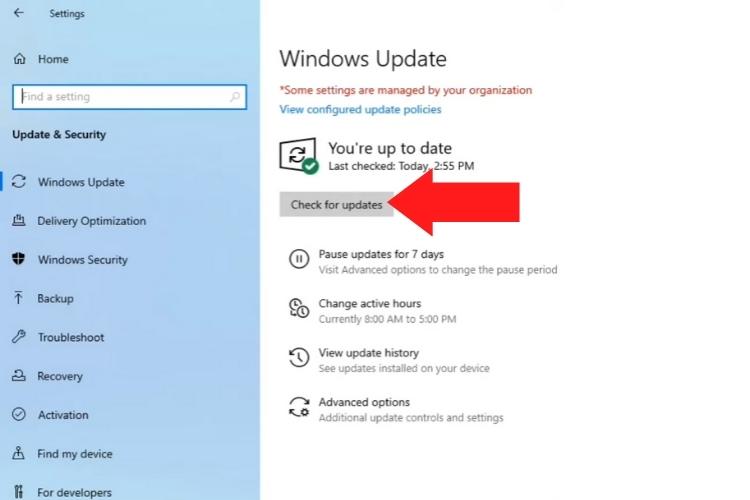
To automatically update the OS:
- Search Updates in the Start menu,
- Click on the " Check for updates option to look for possible updates.
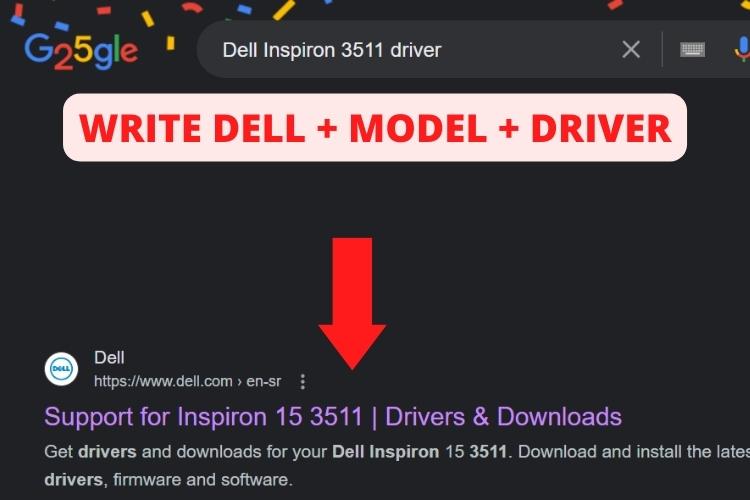
To manually update software:
- Visit Dell.com and search for your laptop model,
- Find the audio driver download page and install the latest driver,
- After updates, restart the laptop and check the microphone function.
Alternatively, you can also try this:
- Go to the Settings > Updates,
- Under the Advanced options, click Optional Updates,
- Here, you'll find extra drivers related to your PC. If you see any driver pack about audio, install it.
For more insights, check out this helpful video.
12. Contact The Service Center
If you have tried all other troubleshooting steps and the microphone not working on your Dell laptop, it may be time to contact the Dell service center. You can get in touch via their email or contact them via their phone number (1866 795 5597).
When preparing to contact Dell support, keep these tips in mind:
- Have your laptop's service tag number ready for identification.
- Clearly describe the microphone issue and troubleshooting attempted.
- Provide as many specific details upfront to expedite resolution.
- Ask for an in-person visit for detailed checkups and repairs.
- Follow all recommendations and instructions from the technician.
For better understanding, check out this helpful video.
FAQs
To fix the microphone on your Dell laptop, try updating your audio drivers, inspecting the hardware for damage, adjusting the mic audio setting, and testing different mics to isolate the issue. If needed, contact Dell support for advanced troubleshooting.
To find your microphone settings on your Dell laptop, go to the Control panel > Sound > Recording tab. Right-click your microphone and select Properties to access volume levels and other options.
Your laptop is not picking up the built-in microphone because it may be disabled, set too low, or not set as default. Also, look for hardware damage, compatibility issues, app permissions, and interference problems.
To test if your mic is working, record your voice in Sound settings or an app like Audacity. Play back the recording audio to verify the microphone detects input and that the audio is clear.
Conclusion
The final say is that the Dell laptop microphone not working can be due to outdated drivers, wrong settings, or hardware damage.
You can fix the issue by restarting your PC. If the problem persists, update your OS or driver packs. Don't forget to check compatibility troubles and run a troubleshooting to catch the culprit. If your mic still doesn't work, make use of the Dell Diagnostics.
Lastly, you can reach out to Dell via email or contact number to consult about software or hardware issues. With persistence and clever troubleshooting, your mic will be ringing again during calls and recordings in no time.