FL Studio has emerged as a boon for newbie music producers who are trying to find their way around programming and arranging music.
It is a combination of a friendly interface and sophisticated sounds. The demo version is available for free so that prospective users can get a gist of what this music production software has to offer.
Over the years, FL Studio has developed its utilities and made its mark as one of the most respected DAWs in the music industry. Its user base includes popular electronic music producer Deadmau5 as well!
But enough beating around the bush. We are here today to discuss how to use autotune in FL Studio. If you are even a tad bit into music production, you will know the importance of autotune in creating music.
Its usage has been exploited over the years, leading to its bad reputation. But if used methodically, autotune can be a great tool to have in your audio production arsenal.
FL Studio is no stranger to an autotune feature, and we are here with a step-by-step guide to help you unlock the possibilities. Let's not delay any further and get right to it.
How to autotune in FL Studio?
Basically, there are three ways in which you can use autotune in your music projects in FL Studio. The first two are FL's native VST plugins: NewTone and Pitcher. And last but not least: third-party autotune plugins.
We will be discussing them one by one. Just follow the simple steps, and you won't need any extra help. It is not complicated at all, and we will save you from intimidation.
Here we go:
NewTone
As its witty name suggests, NewTone is one of the most popular native plugins in FL Studio, especially if you are working with vocals.
It is an excellent means for tuning your pre-recorded voice tracks and other audio samples. The only downside is its inability to work with real-time vocals. But that is a sacrifice you would not mind making.
With NewTone, you can seamlessly tweak around with your vocal samples and fine-tune the audio according to your liking. Simply follow the steps listed below in the order listed, and you'll have melodious-sounding vocals in no time.
Launching NewTone and loading the audio track
- Press f9 to open the mixer.
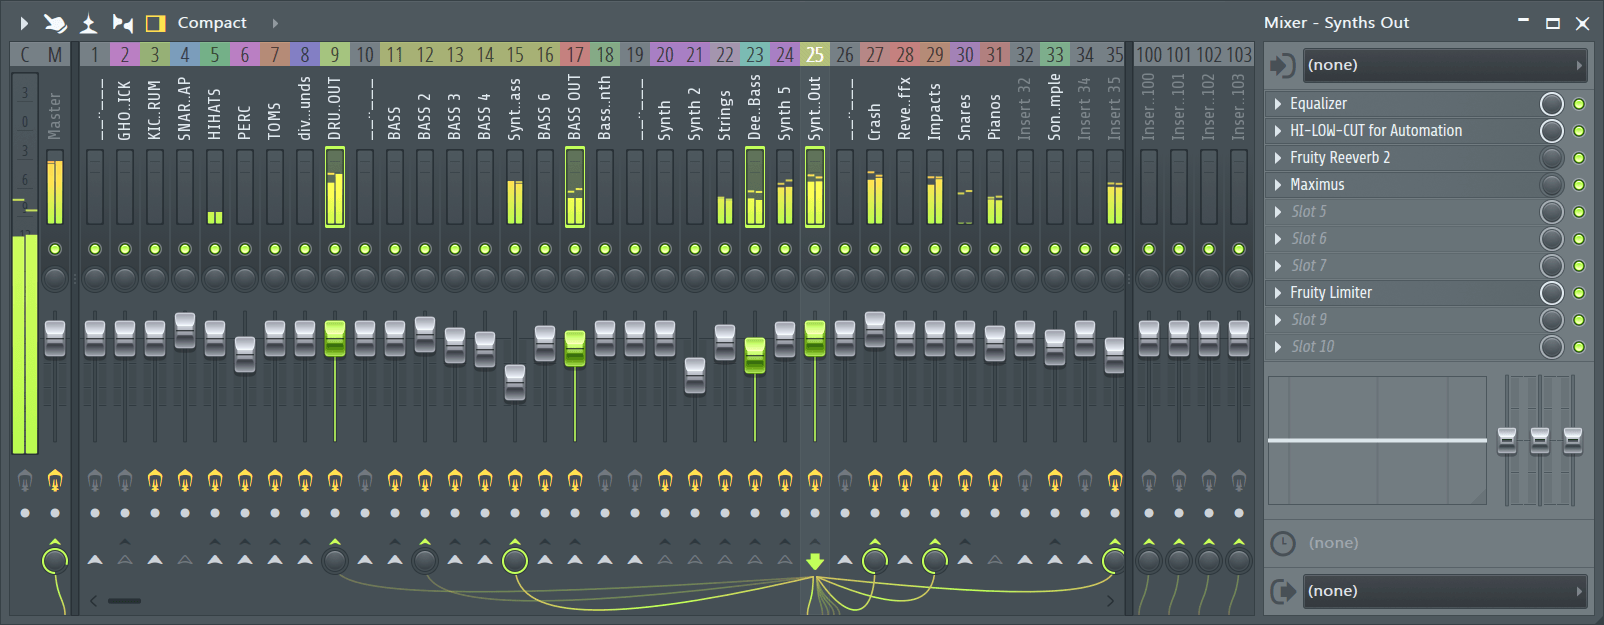
- Choose the desired mixer track where you would want to load NewTone
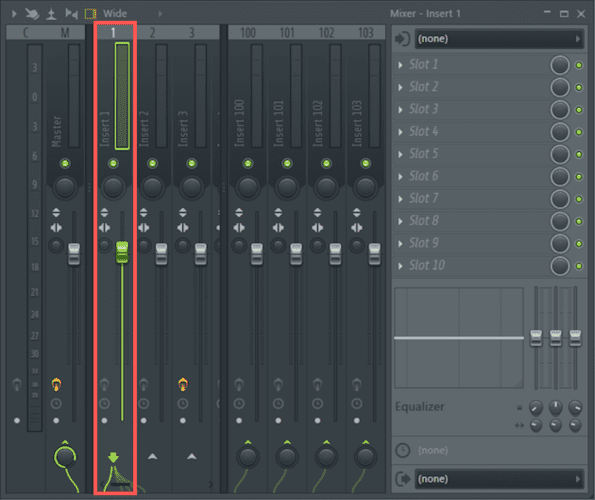
- You will find the insert slot within the mixer track.
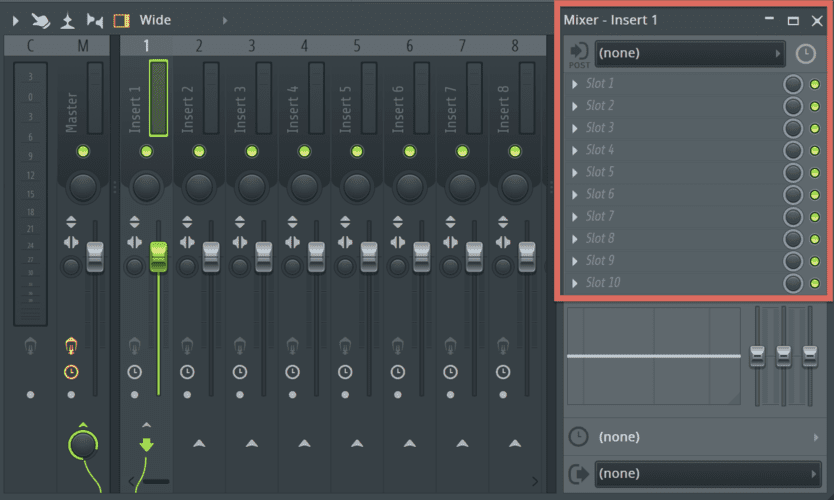
- Click on an empty insert slot to open the drop-down menu.
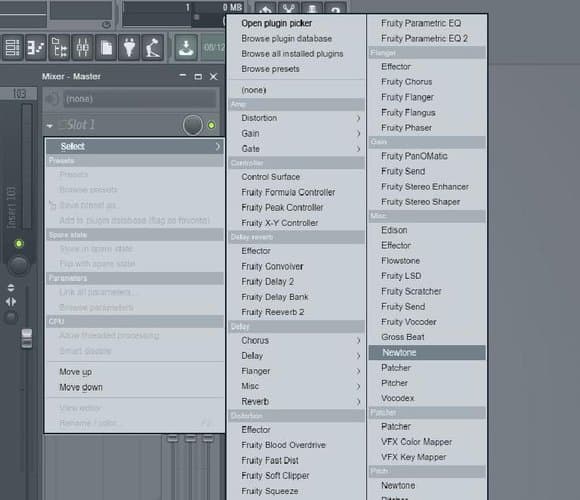
- Find the Misc. section and click on it. You will see NewTone.
- Click on it to launch the plugin.
- Once Newtone has loaded, load the audio track you want to tune. You can simply click on it and drag it into the plugin window.
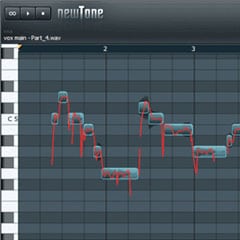
- The moment your audio track reaches NewTone, it will automatically get sliced and distributed against the corresponding notes.
Tuning the audio track
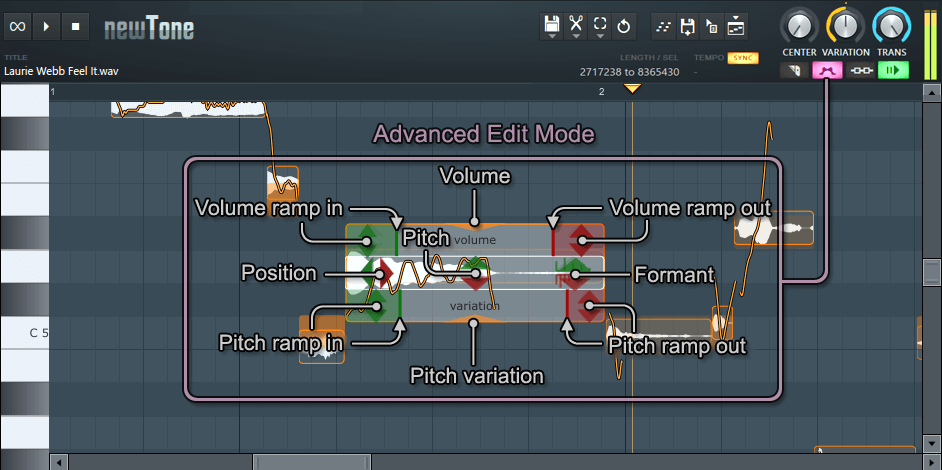
Now that you have your vocal track on NewTone, there are a couple of ways to adjust it or autotune it. On the top right corner of the plugin, you will find three knobs: Centre, Variation, and Trans.
Read Also: 7 Best Melodyne Alternatives (Free & Paid Included)
Using Centre, you can adjust the proximity of your vocals to the note. The higher the value, the more autotune your vocals will sound.
Variation works in the same way that Centre does. A high variation value will give less pitch variation to the vocals when they hit a note. In other words, the vocals will sound robotic if you set a high variation value.
Trans stands for "transient." If you increase the trans value, there will be more variation in the vocals when it transitions from one note to the next. This results in a more natural-sounding output.
It all comes down to your requirements for how you would like to use these three knobs. The combined values will produce an auto tuned vocal as per your choice.
There is another great feature in NewTone. It allows you to click and drag the different parts of your sectioned audio track to different notes. So, if you want to correct the pitch of only particular elements of your vocal track, NewTone lets you do that too.
Exporting and saving the final output
Once you are done applying the autotune effect to your vocal track, the final step is to export the track. You can use the autotuned track only after you have exported it.
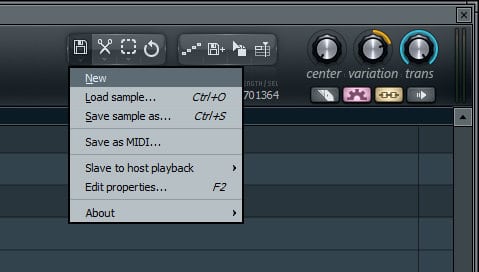
Yet again, NewTone lets you choose from four different export options. You can find these options on the main toolbar, to the right of the plugin. The four export options are:
- Copy the MIDI
- Save as
- Drag selection
- Send to the playlist
You can export the autotune track in whichever way you would like.
Pitcher
Another amazing native autotune plugin in FL Studio is the Pitcher. Pitcher, unlike NewTone, handles pitch correction on your vocal track in real time. You don't have to load any pre-recorded audio track into the plugin to avail its services. Here is a stepwise guide to use Pitcher in your project:
Launching Pitcher
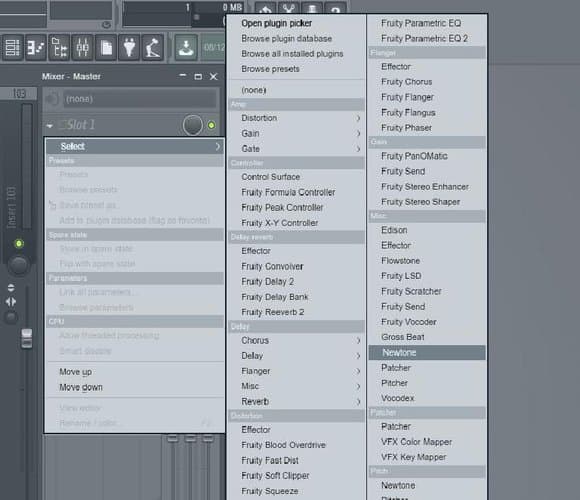
Keep in mind that Pitcher is an effect plugin. As a result, you must ensure that it is loaded on the same mixer track as your vocal track. Only then will Pitcher be able to perform its real-time autotuning function on the track. Follow the steps below to launch Pitcher:
- Press f9 to open the mixer.
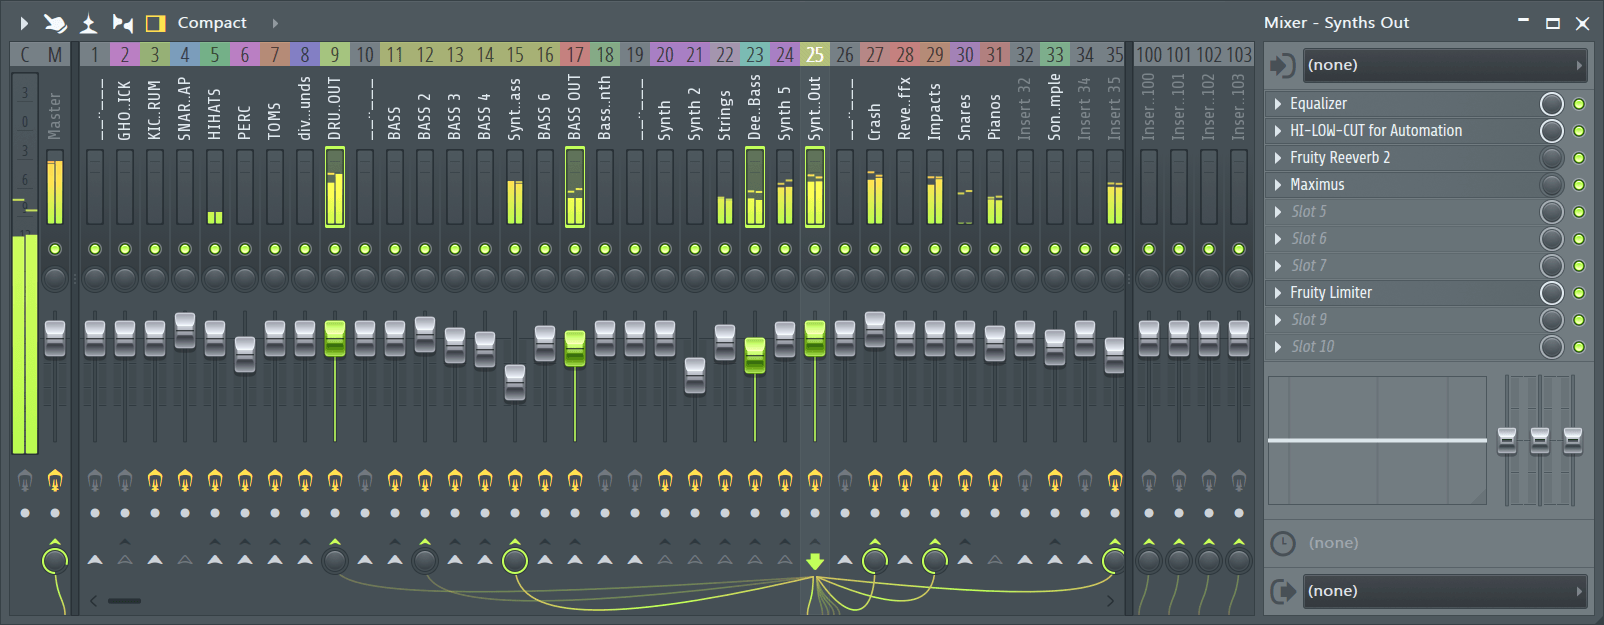
- Choose the mixer track that is linked to your vocal track.
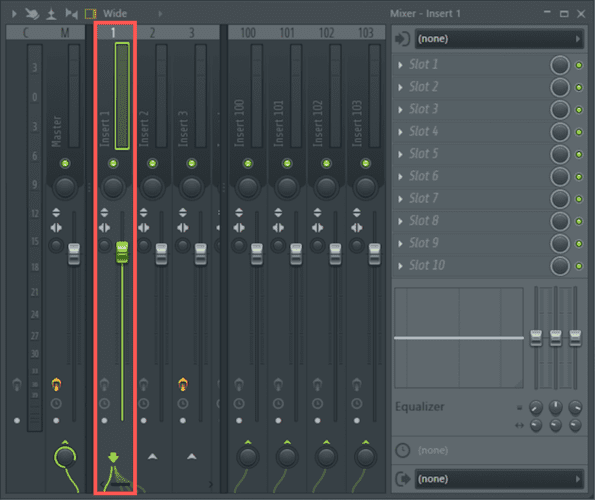
- From the menu, select Pitcher and wait for it to load. It will take hardly a second.
Working with Pitcher
After a successful loading, Pitcher is ready to work. You can instantly hear its magic on the vocal track once you hit the play button or space bar. Pitcher plays the vocal track from the mixer track through the speakers, headphones, and monitors.
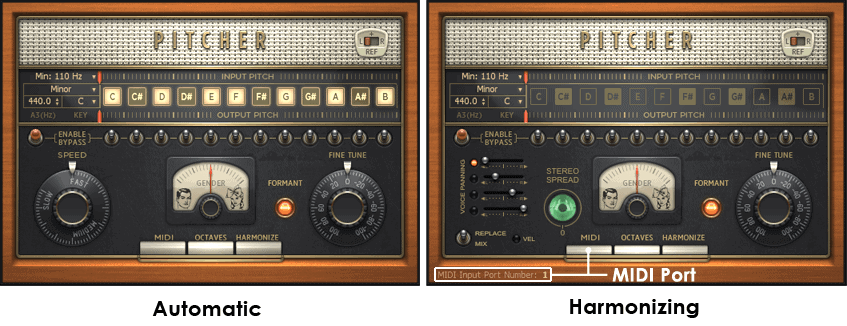
Pitcher is an absolutely hands-on tool to find out which key your vocal track has been sung in. Likewise, it also enables you to determine which key you would like your vocals to be in.
Additionally, you can also select the notes to which you would like your vocals to be limited.
You can do so by simply clicking on the individual notes. The notes that are lit up are the ones to which you like to confine your vocals. The notes that are not lit up are those that you would want your vocal track to avoid.
Pitcher also lets you manipulate the speed of the pitch and fine-tune the vocals. The big dial on the left of the plugin is for pitch speed, and the one on the right is for fine-tuning.
Third-party plugins
Other than these two native autotune plugins, you are free to work with a host of third-party plugins. To name a few, Antares Autotune, Waves Tune Live, and Celemony Melodyne are some alternatives.
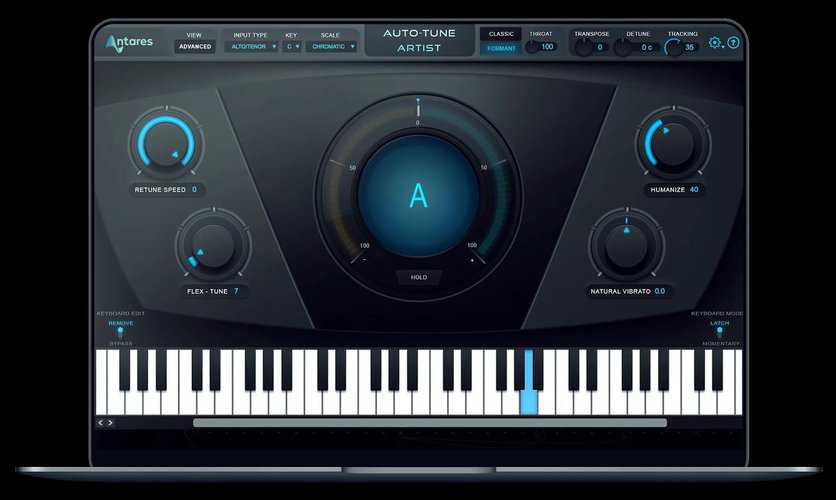
There is no question that all these autotune plugins are great. But they can be a bit overwhelming and complicated to use. The learning curve is quite steep with these plugins, and it will end up confusing you about how you want your vocals to sound.
Besides, being third-party plugins, there is a possibility that they might crash your project. If you are using FL Studio on a moderate system, we would highly recommend you against using them. Stick to the native plugins, and you will get just as fine an output as any other plugin. It all depends on your tweaking!
Recommended read: 6 Best Music Genre Finder Websites to Check Genres of any Song
Conclusion
Using autotune is no less than an art, and FL Studio has made it very easy for us. When you are dealing with vocals, you need to be very careful.
It is the central part of any song and draws the most attention. Anything other than naturally sounding can be a huge turn-off. There are some producers who rush the process, and as a result, the output is no different than a robotic cacophony.
NewTone and Pitcher are like icing on the cake. In order to get the most out of them, you have to first ensure that your vocals are sung and recorded in the right manner.
And by that, we mean that the singer should sing in the right key. Any major deviations can be very difficult to mend. And if you overdo it, it will ruin your entire song.
Here is what we would recommend: Before you start using autotune in your FL Studio project, try experimenting with sampled vocals. Get a feel for how these plugins work. And once you've gained enough confidence, the sky's the limit!

